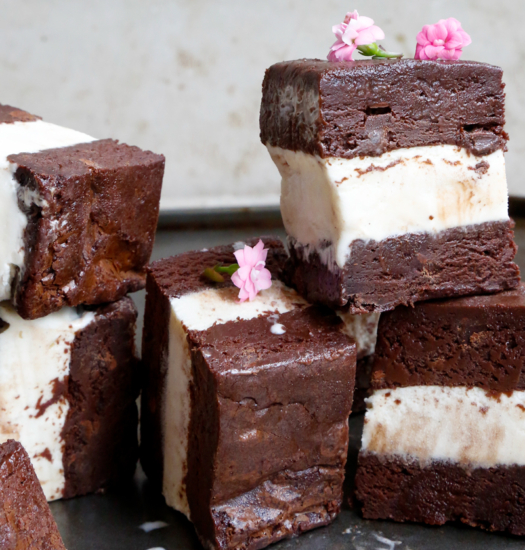
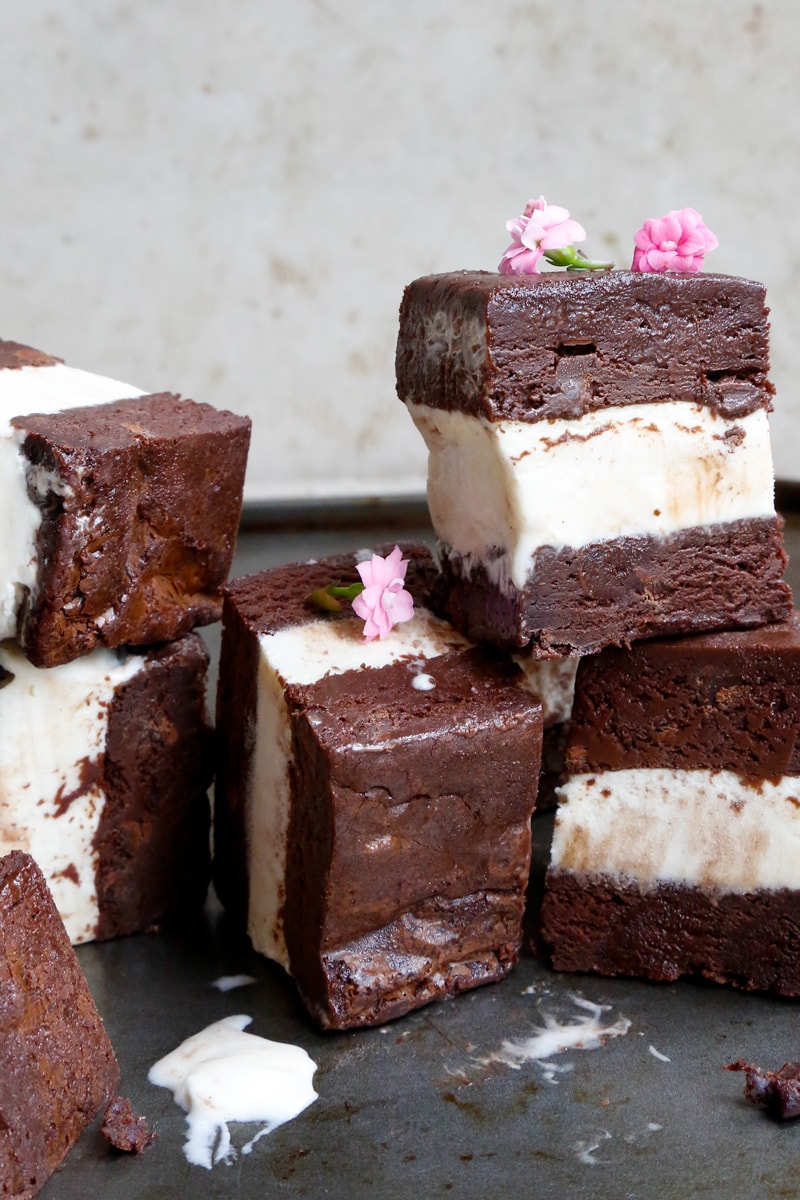
Frozen, fudgy, and perfectly sweet, vegan brownie ice cream sandwiches. Homemade chocolate brownies, slightly underbaked so they’re still chewy and fudgy after frozen. Chewy brownies with a classic crinkle top sandwiched with a generous layer of vegan vanilla ice cream. Make these homemade ice cream sandwiches and be gifted with a chocolatey, rich, decadent dessert, that’s the perfect treat for the hottest days of the year.
These vegan brownie ice cream sandwiches…
- are super easy to make, and will easily become your new favorite treats.
- are the perfect summer treat to keep stocked in the freezer.
- has a fudgy brownie that STAYS fudgy after freezing, unlike other brownie ice cream sandwiches!
Ingredients for vegan brownie ice cream sandwiches
- Flour: the perfect amount of all-purpose so the brownies stay fudgy even after they’ve been frozen.
- Cocoa: Dutch-process cocoa is something you have to use! If you use regular cocoa powder or even cacao your brownies will taste bitter, and that’s not what you want!
- Vegan butter: I always like using salted vegan butter, but use unsalted vegan butter if you prefer. Just add in an extra pinch of salt to balance everything out.
- Chocolate: Dark chocolate chips, or even dark chocolate, chopped into chunks. Dark chocolate chips are my go-to as it means I don’t have to chop any chocolate!
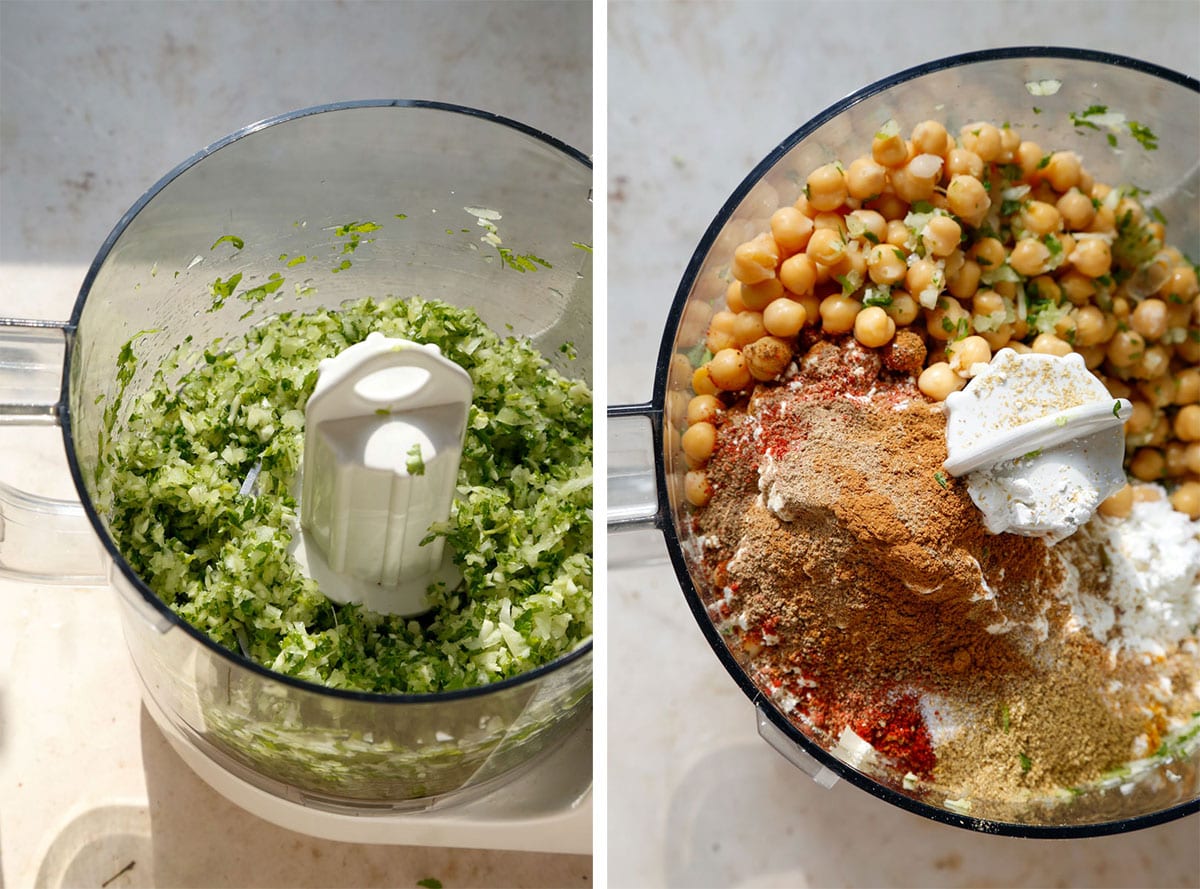
- Aquafaba: It’s the liquid from tinned chickpeas. And before I scare you off, just trust me!! This ingredient is the secret to my crinkle-top fudgy brownies!
- Sugars: The combination of the light brown sugar and granulated gifts us with the perfect texture for fudgy af vegan brownies!
- Vanilla extract: Just a touch! Be sure to use vanilla extract and not vanilla essence. As essence is NOT vegan!
- Salt: All sweet things need a little salt!
- Ice cream: I like to use vegan vanilla ice cream where the vanilla bean is visible. But this is completely optional and it won’t make a difference to the final result! Use your favorite ice cream flavor, I’m talking strawberry ice cream, mint chocolate chip ice cream or even chocolate ice cream. Whatever flavor you want!

All about the fudgy, crinkle-top brownies
I had to make a few little tweaks from my seriously fudgy vegan brownie recipe to achieve the perfect brownie recipe, that still becomes fudgy within 5 minutes after removing it from the freezer. That way, you get the perfect bite, of vegan vanilla ice cream sandwiches in between fudgy brownies!!
Start by lining a square baking pan with aluminum foil. I like to use foil for two reasons, one, it’s easier and because once frozen it comes off the brownie base easily. Using clean hands, grease with a little vegan butter. Set aside.
In a medium bowl, sift the all-purpose flour, dutch process cocao powder, and salt. Give a mix together until everything is well combined. Grab a small bowl, and toss the vegan chocolate chips with a tablespoon of dry ingredients. This will prevent the chocolate chips from sinking when they bake!
To make the perfect frozen crinkle top brownie batter, grab a large glass bowl and add in the aquafaba, light brown sugar and granulated sugar. Whisk with a hand mixer, and very slowly, you’ll see the mixture turn into a meringue-like texture, that’s white in colour. This step takes around 3-4 minutes, and if it takes a little longer it’s okay! Whisking until it turns white and a little thick is the key to that classic crinkle top! You may need to scrape down the sides of the bowl once in a while to make sure everything gets mixed!

Melting the vegan butter and chocolate
Next, you want to melt the vegan butter and vegan dark chocolate using the bain-marie method. Simply heat water in a small saucepan until it starts to boil. While you wait, add the vegan butter and vegan dark chocolate chips into a bowl. Place the bowl over the small saucepan to melt everything. The key is to make sure the water isn’t touching the bottom of the bowl, if there’s a little too much water, just pour it out! Allow the vegan butter and vegan chocolate to melt completely, and give it a mix once in a while to make sure it doesn’t burn.

Carefully pour the melted butter and melted chocolate mixture into the aquafaba mixture. Add in the vanilla extract, and gently fold everything together until all the swirls are gone, and it’s all one color.
Add the dry ingredients to the bowl with the wet ingredients. Fold together until nearly combined, add in the flour-covered dark chocolate chips and fold until no flour is visible.

Time to (under)bake!
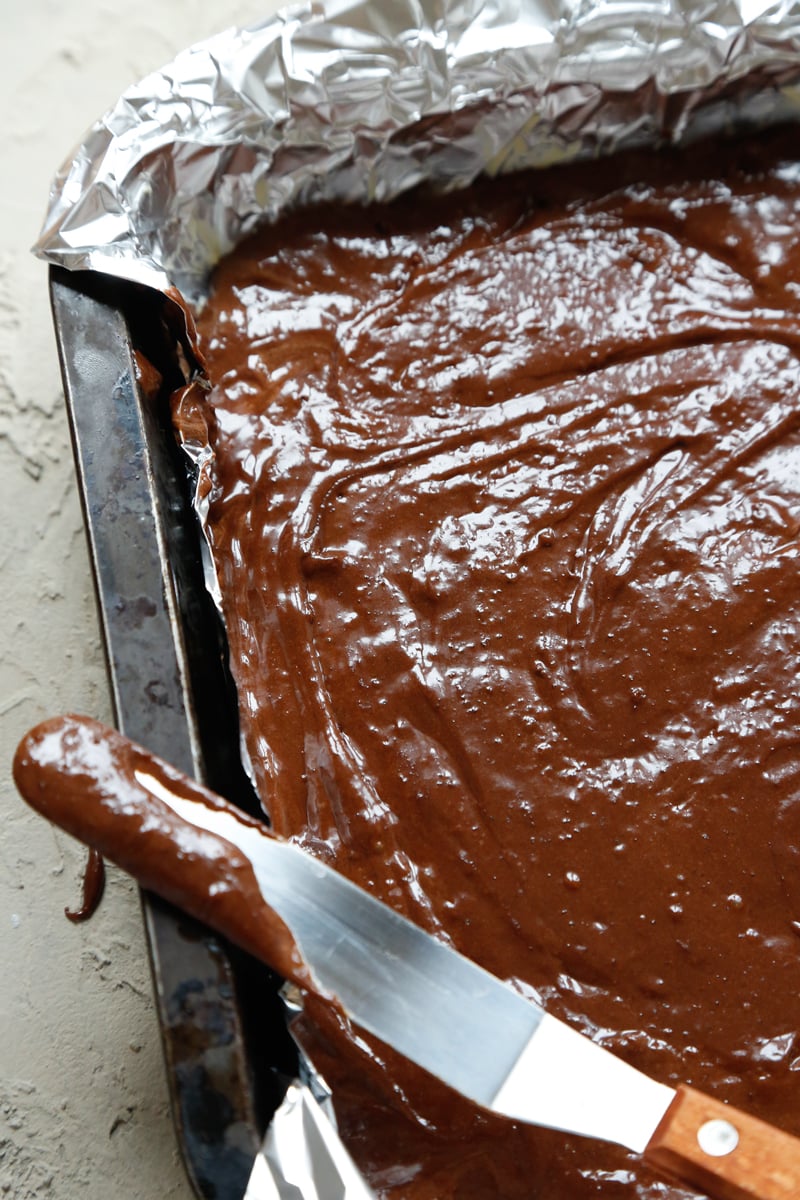
Pour the batter into the prepared pan, using an offset spatula spread the thick brownie batter into an even layer and bake for 20 minutes in the preheated oven!
Cooking for a shorter time means that when the brownies come out they will still be underbaked and VERY gooey. That’s why it’s super important to allow the brownies to cool completely. Once they bake, place them on a wire rack and once cooled, grab an offset spatula or spoon, and gently press down on the puffed-up edges. Then, cover the baking pan with foil, and transfer the cool brownies into the freezer and freezer for 6hrs. I like to freeze them overnight!
Assembling the vegan ice cream sandwiches
Add all the vegan vanilla ice cream into a large bowl, and beat it together until it softens up slightly. Remove the frozen brownies from the freezer, and carefully remove all the foil. Place a layer of foil to the bottom of the same pan you just removed the brownies from. On a cutting board and with a sharp knife, cut the brownie in half. Place the brownies one on top of the other and cut off the edges of the short sides, this is optional but it just makes them look prettier when serving! Place one of the halved brownie slices on the baking pan, lined with foil, with the crinkle side facing down.

And with a cookie or ice cream scoop, dollop a few scoops of the softened vanilla ice cream over the top of the bottom brownie layer. Using a spatula or the back of a spoon, spread it over the base into an even(ish) layer. Place the second brownie layer, with the crinkle side facing up on top of the ice cream, and gently press to secure. All these steps do need to be done pretty quickly because the softened ice cream will turn into melted ice cream!!
Freezing the dessert sandwiches
Next, cover the exposed sides of the brownie with foil. And if you want to free up space in your freezer, tightly wrap the block of vegan brownie ice cream sandwiches with plastic wrap. The easiest way to do this is to place a large enough cutting of plastic wrap on your counter top, transfer the brownie ice cream sandwich, and then wrap around it. Because my vegan vanilla ice cream melted pretty quick, I used the first method of just covering the exposed sides with foil. This way, I could get it into the freezer quicker, without making a mess. And after, maybe around 6hrs, I did remove it from the freezer, and then wrap in some plastic wrap, just to free up some space in my freezer!
The hardest part – freeze overnight. Seriously. I know you might want to freeze it for a couple of hours, but please don’t! Freezing overnight is crucial for clean-cut ice cream sandwiches. Plus, the centre of the vanilla ice cream layer will take quite a while to freeze completely. So, just be patient! It’s worth it!

The next day, remove the plastic wrap from the brownie ice cream sandwiches and slice them into bars with a sharp knife. Cleaning the knife with a damp towel after each cut will give you the cleanest cuts! And now? ENJOY these delicious brownie ice cream sandwiches on a hot day, with your loved ones! And be sure to keep an extra one stashed away in the freezer for yourself!
After you make this brownie ice cream sandwich recipe, please leave a star rating and review below! I try my best to respond to you all. Oh, and don’t forget to tag me over on Instagram – I can’t wait to see your images!!

Tips on making the perfect brownie ice cream sandwiches
- The easiest way to make these homemade brownie ice cream sandwiches is to make the homemade brownies the day before.
- Place the brownie slice on a baking sheet, or in the same pan the brownies were baked and frozen in. This way, if the ice cream starts to melt super quickly, you can just cover the top of the ice cream sandwiches with foil, and freeze that way.
- Use softened ice cream, so you’re not putting too much pressure on the brownies when spreading the ice cream into an even layer.
- Slice with a sharp knife and clean it after every slice for neat slices.
- Serve immediately after slicing!
How to store vegan ice cream sandwiches?
Truthfully, I’ll be surprised if they don’t somehow magically disappear before your eyes But if they don’t, just wrap them up with plastic wrap or foil! Don’t wait too long to re-freeze them, as the brownies become fudgy and gooey pretty quickly. And remove them from the freezer 5ish minutes before serving!
Prefer to watch over read?
Here’s my video tutorial!
More vegan recipes you’ll love
Print Brownie Ice Cream Sandwiches (vegan)
- Total Time: 18 hours 35 minutes
- Yield: 10 slices 1x
Description
Frozen, fudgy, and perfectly sweet, vegan brownie ice cream sandwiches. Homemade chocolate brownies, slightly underbaked so they’re still chewy and fudgy after frozen.
Ingredients
- 126 g aquafaba
- 160 g granulated sugar
- 120 g light brown sugar
- 1/2 tbsp vanilla extract
- 113 g salted vegan butter
- 140 g vegan dark chocolate (or more vegan choc chips)
- 46 g Dutch process cocoa
- 160 g all purpose flour
- 1/2 tsp salt
- 87 g vegan chocolate chips (I like to use dark )
- 4–6 scoops vanilla ice cream
Instructions
Fudgy vegan brownies
- Preheat Preheat oven to 180°C/356°F. Line a 9-inch or 8-inch square baking pan with foil. Lightly grease the foil with vegan butter.
- Sift Sift all-purpose flour, Dutch-process cocoa and salt. Give it a mix together until well combined. Then, take around 1 tbsp of that mixture and combine it with vegan chocolate chips. Set aside.
- Whisk In another bowl, add aquafaba, granulated sugar and brown sugar. Whisk with a handheld whisk for around 3-4 minutes or until it becomes white in colour and thick – kinda like meringue! Using the bain-marie method, melt salted vegan butter and vegan dark chocolate. Pour into the aquafaba mixture, add in vanilla extract, and gently fold together until well combined. Add in the dry ingredients, combine until mostly combined, and then add the vegan chocolate chips. Fold together until no flour is visible.
- Bake Pour into the prepared baking pan. With an offset spatula, spread the batter into an even layer. Bake for 20 minutes. They will still be underbaked and gooey inside because we want brownies that stay fudgy even once frozen!!
- Cool Once they're done baking, transfer the baking tray onto a cooling rack and allow it to cool completely. With the back of a spoon, gently press the puffed-up edges *see the video. Once the baking tray is completely cooled, cover the brownies with more foil and freeze overnight (or for at least 4 hours).
Final touches
- Freeze Grab your vegan vanilla ice cream out of the freezer, and set it aside so it softens slightly. Next, grab the frozen block of brownies, remove all the foil from the brownies. Add another layer of foil to the bottom of the pan. Measure the brownie, and cut the brownie in half. Place back into the pan with the foil, with the crinkle side facing down. *read blog post for more tips!
- Add the scoops of softened vanilla ice cream, and with an offset spatula, spread into an even(ish) layer. Place the second half of the brownie on top, with the crinkle side facing up. Wrap with plastic wrap, or just cover the exposed sides with foil, and pop in the freezer overnight. You could freeze for 12 hours, but for the best results freeze overnight (or for up to 2-3 months!)
- Slice The next day, slice into 10 bars, and enjoy immediately!
- Prep Time: 15 minutes
- Cook Time: 20 minutes
- Category: Dessert
- Cuisine: American
This post may contain affiliate links